


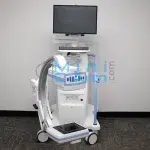

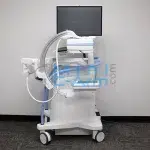
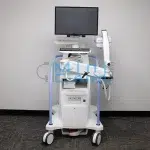
The Hologic Insight FD is a compact, high-resolution mini C-arm imaging system designed specifically for extremity imaging in orthopedic surgery, outpatient centers, and sports medicine. Featuring a rotating flat-panel detector, 2k x 1.5k resolution, and dose optimization technology, the Insight FD delivers exceptional image quality with minimized radiation exposure.
Contact Minicarm.com today to request pricing, rental, or financing options.
1 (800) 643-2998
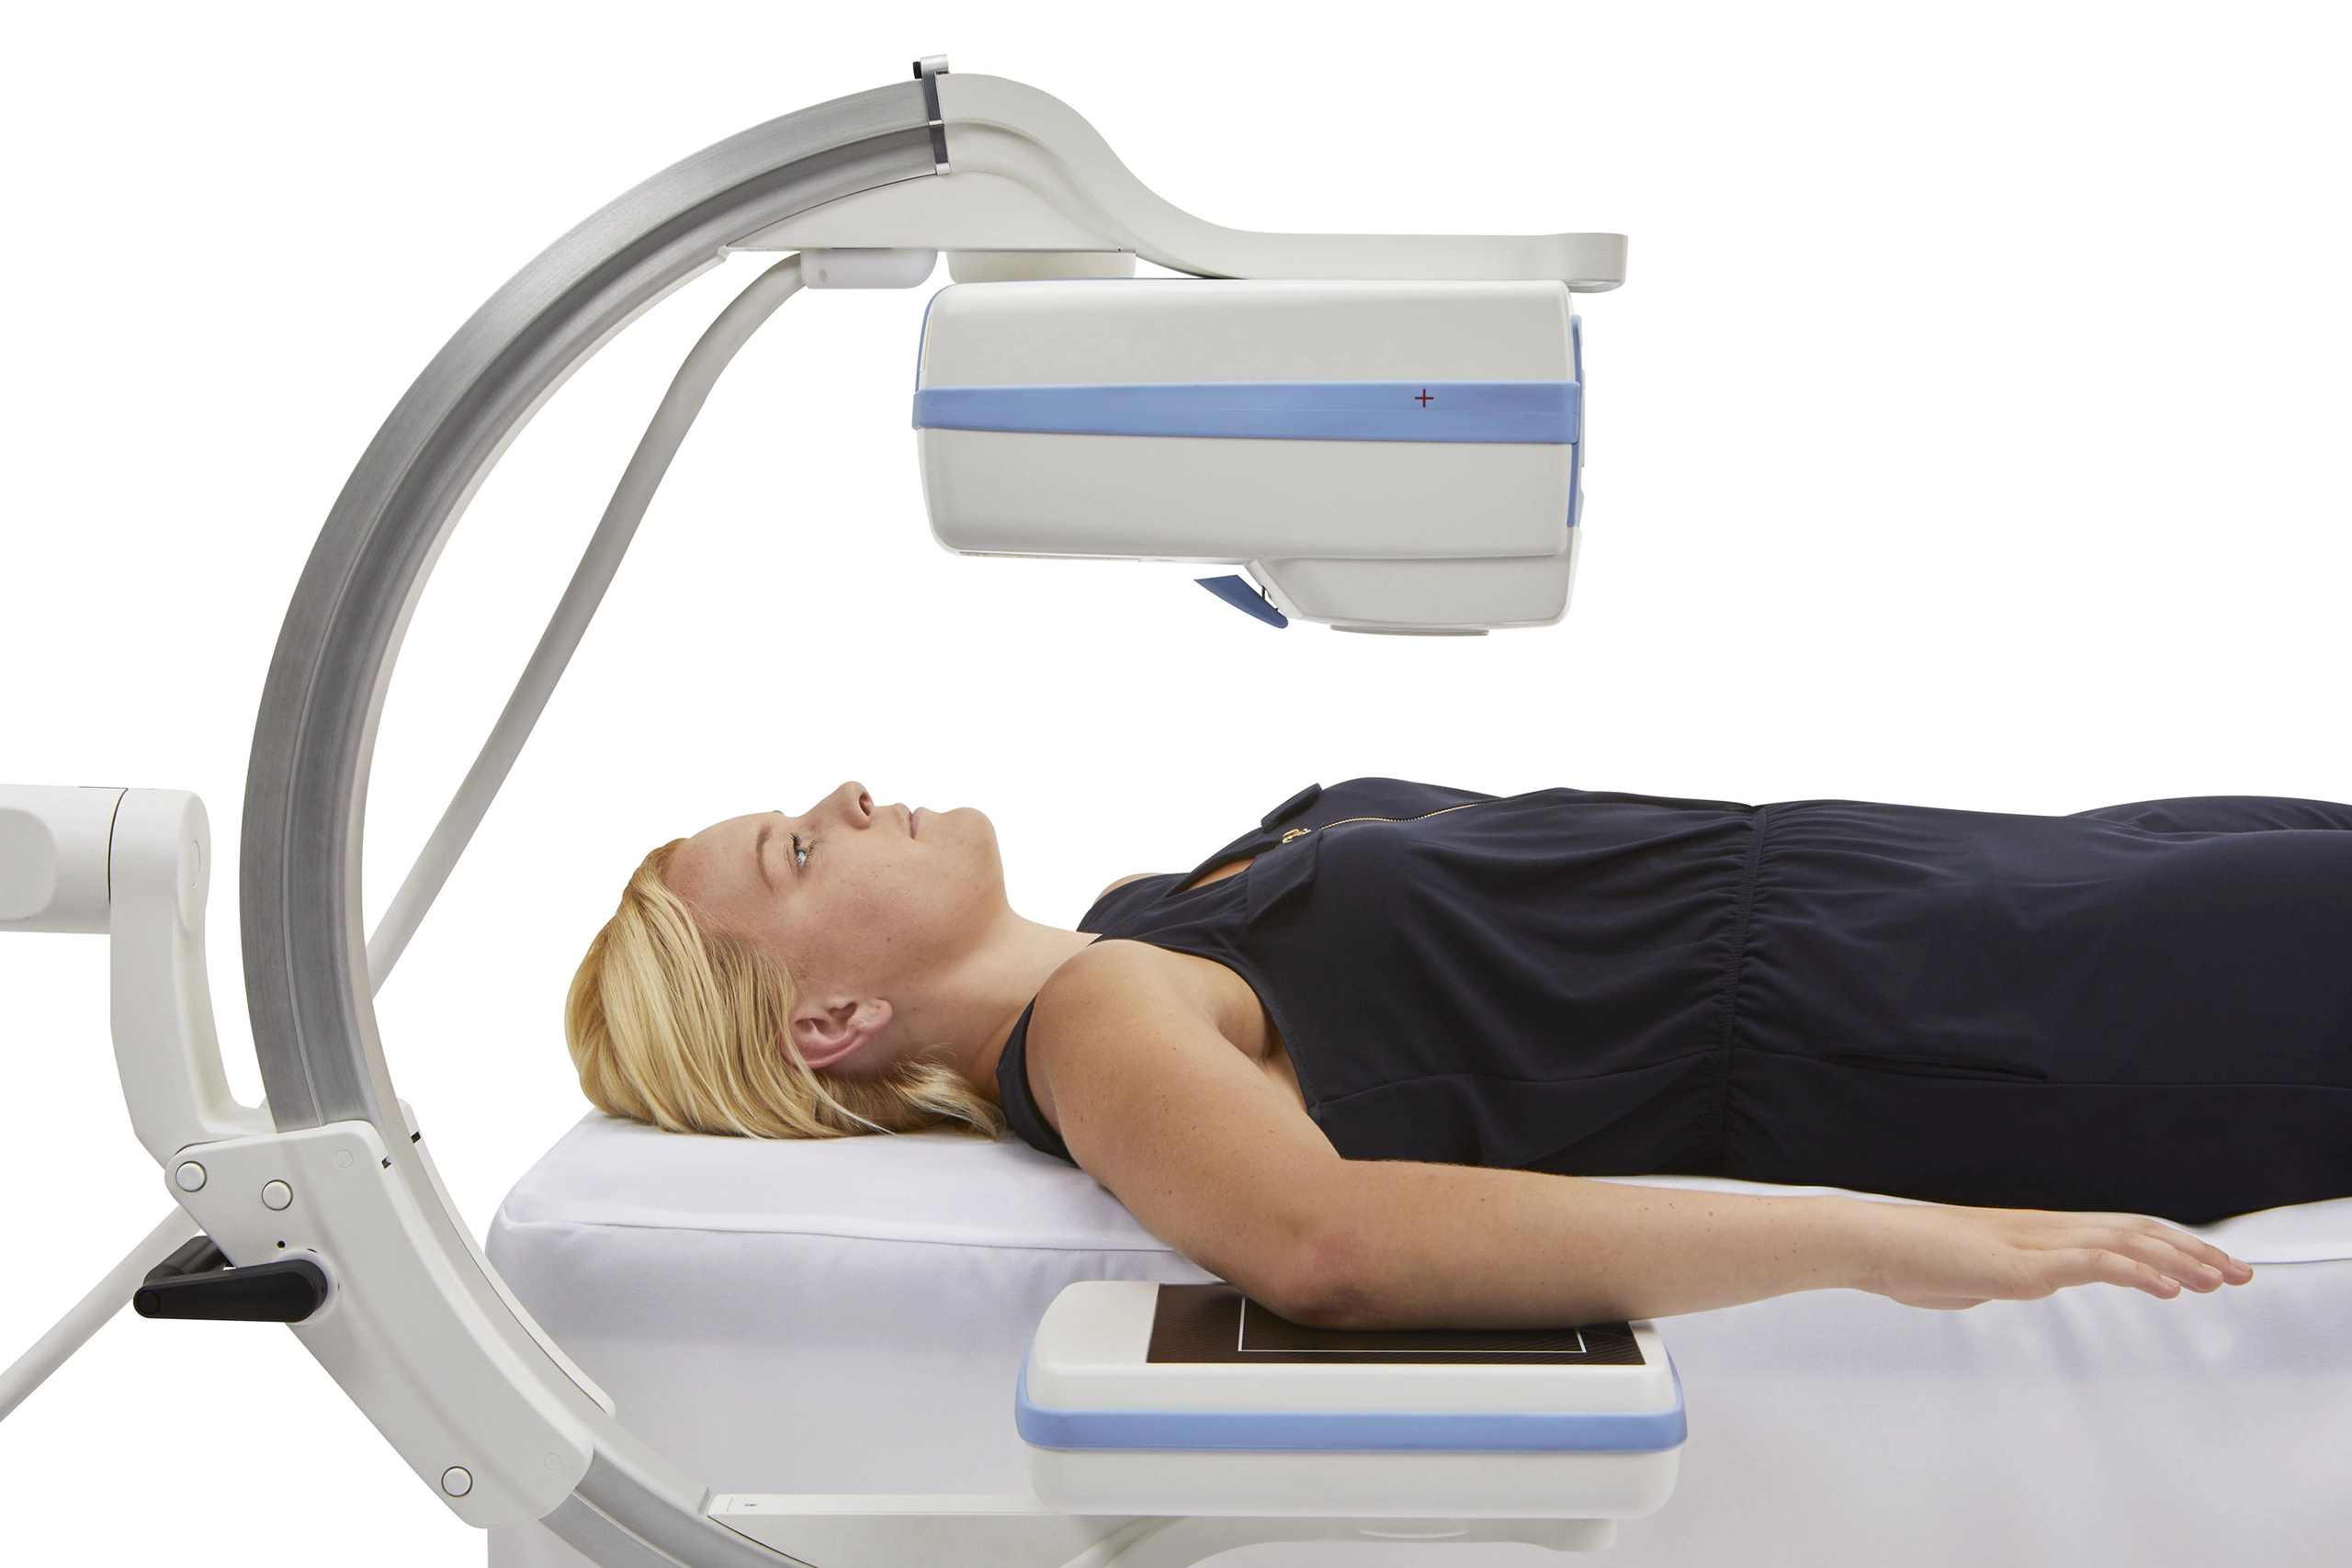
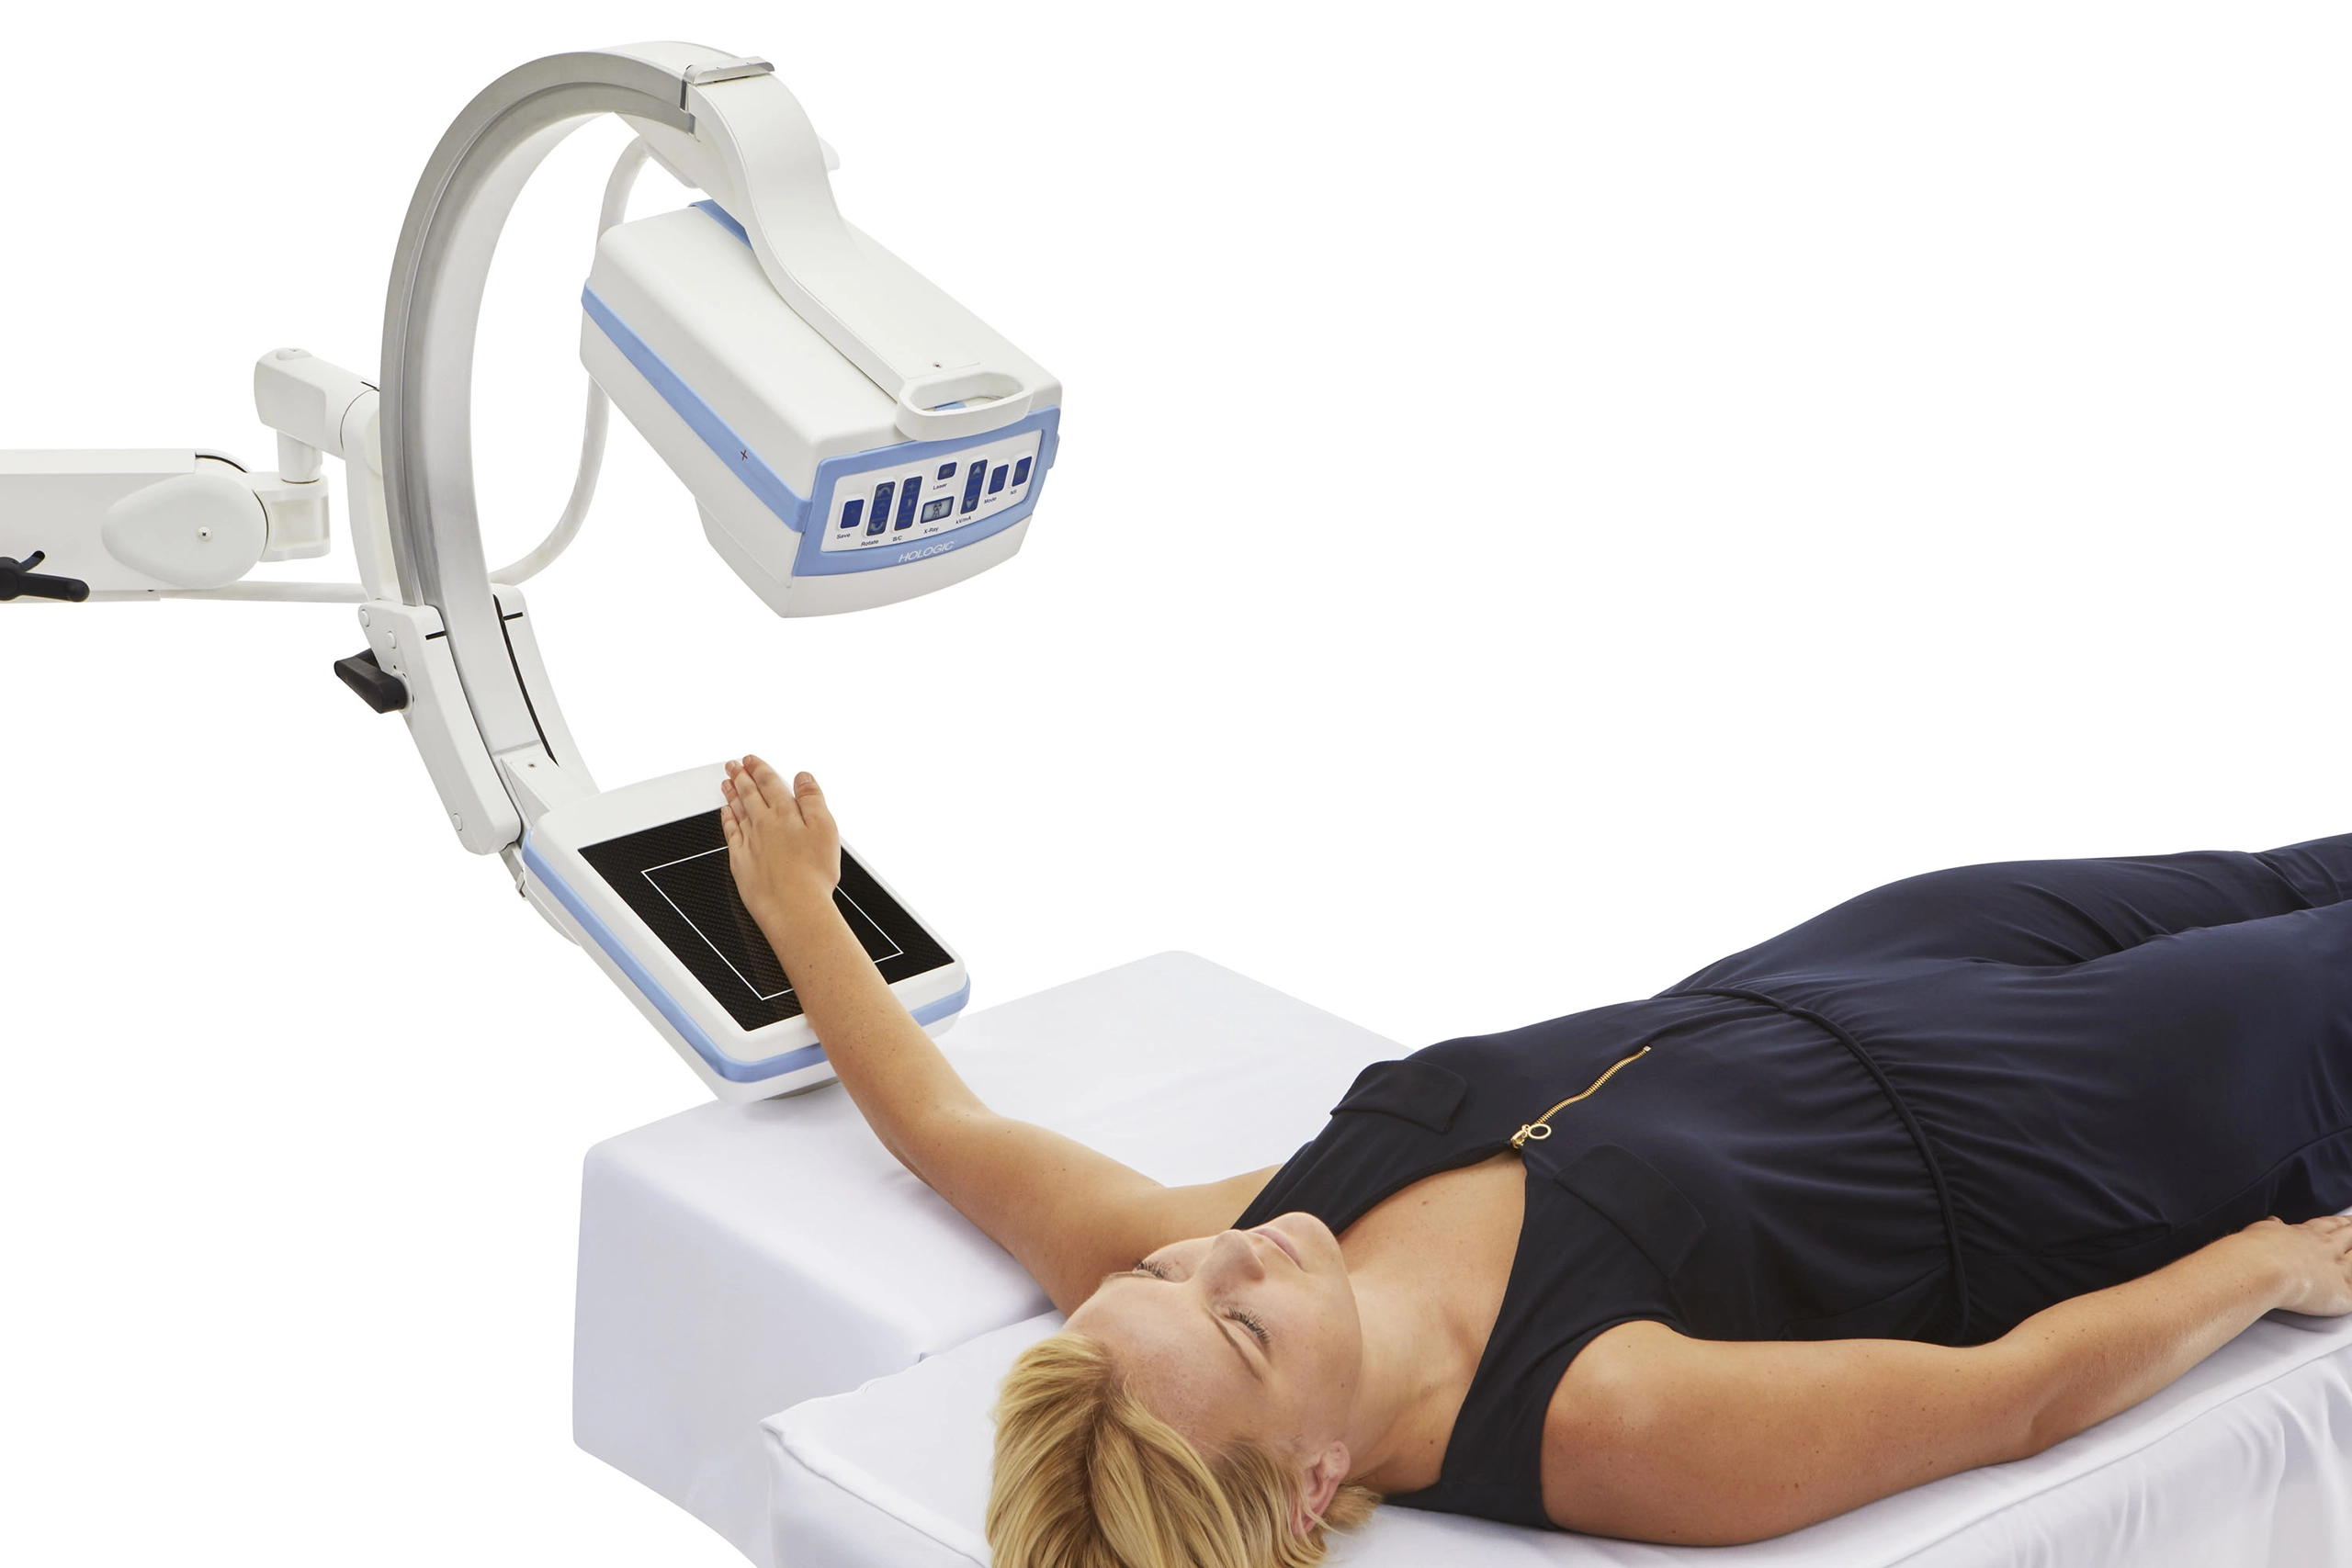
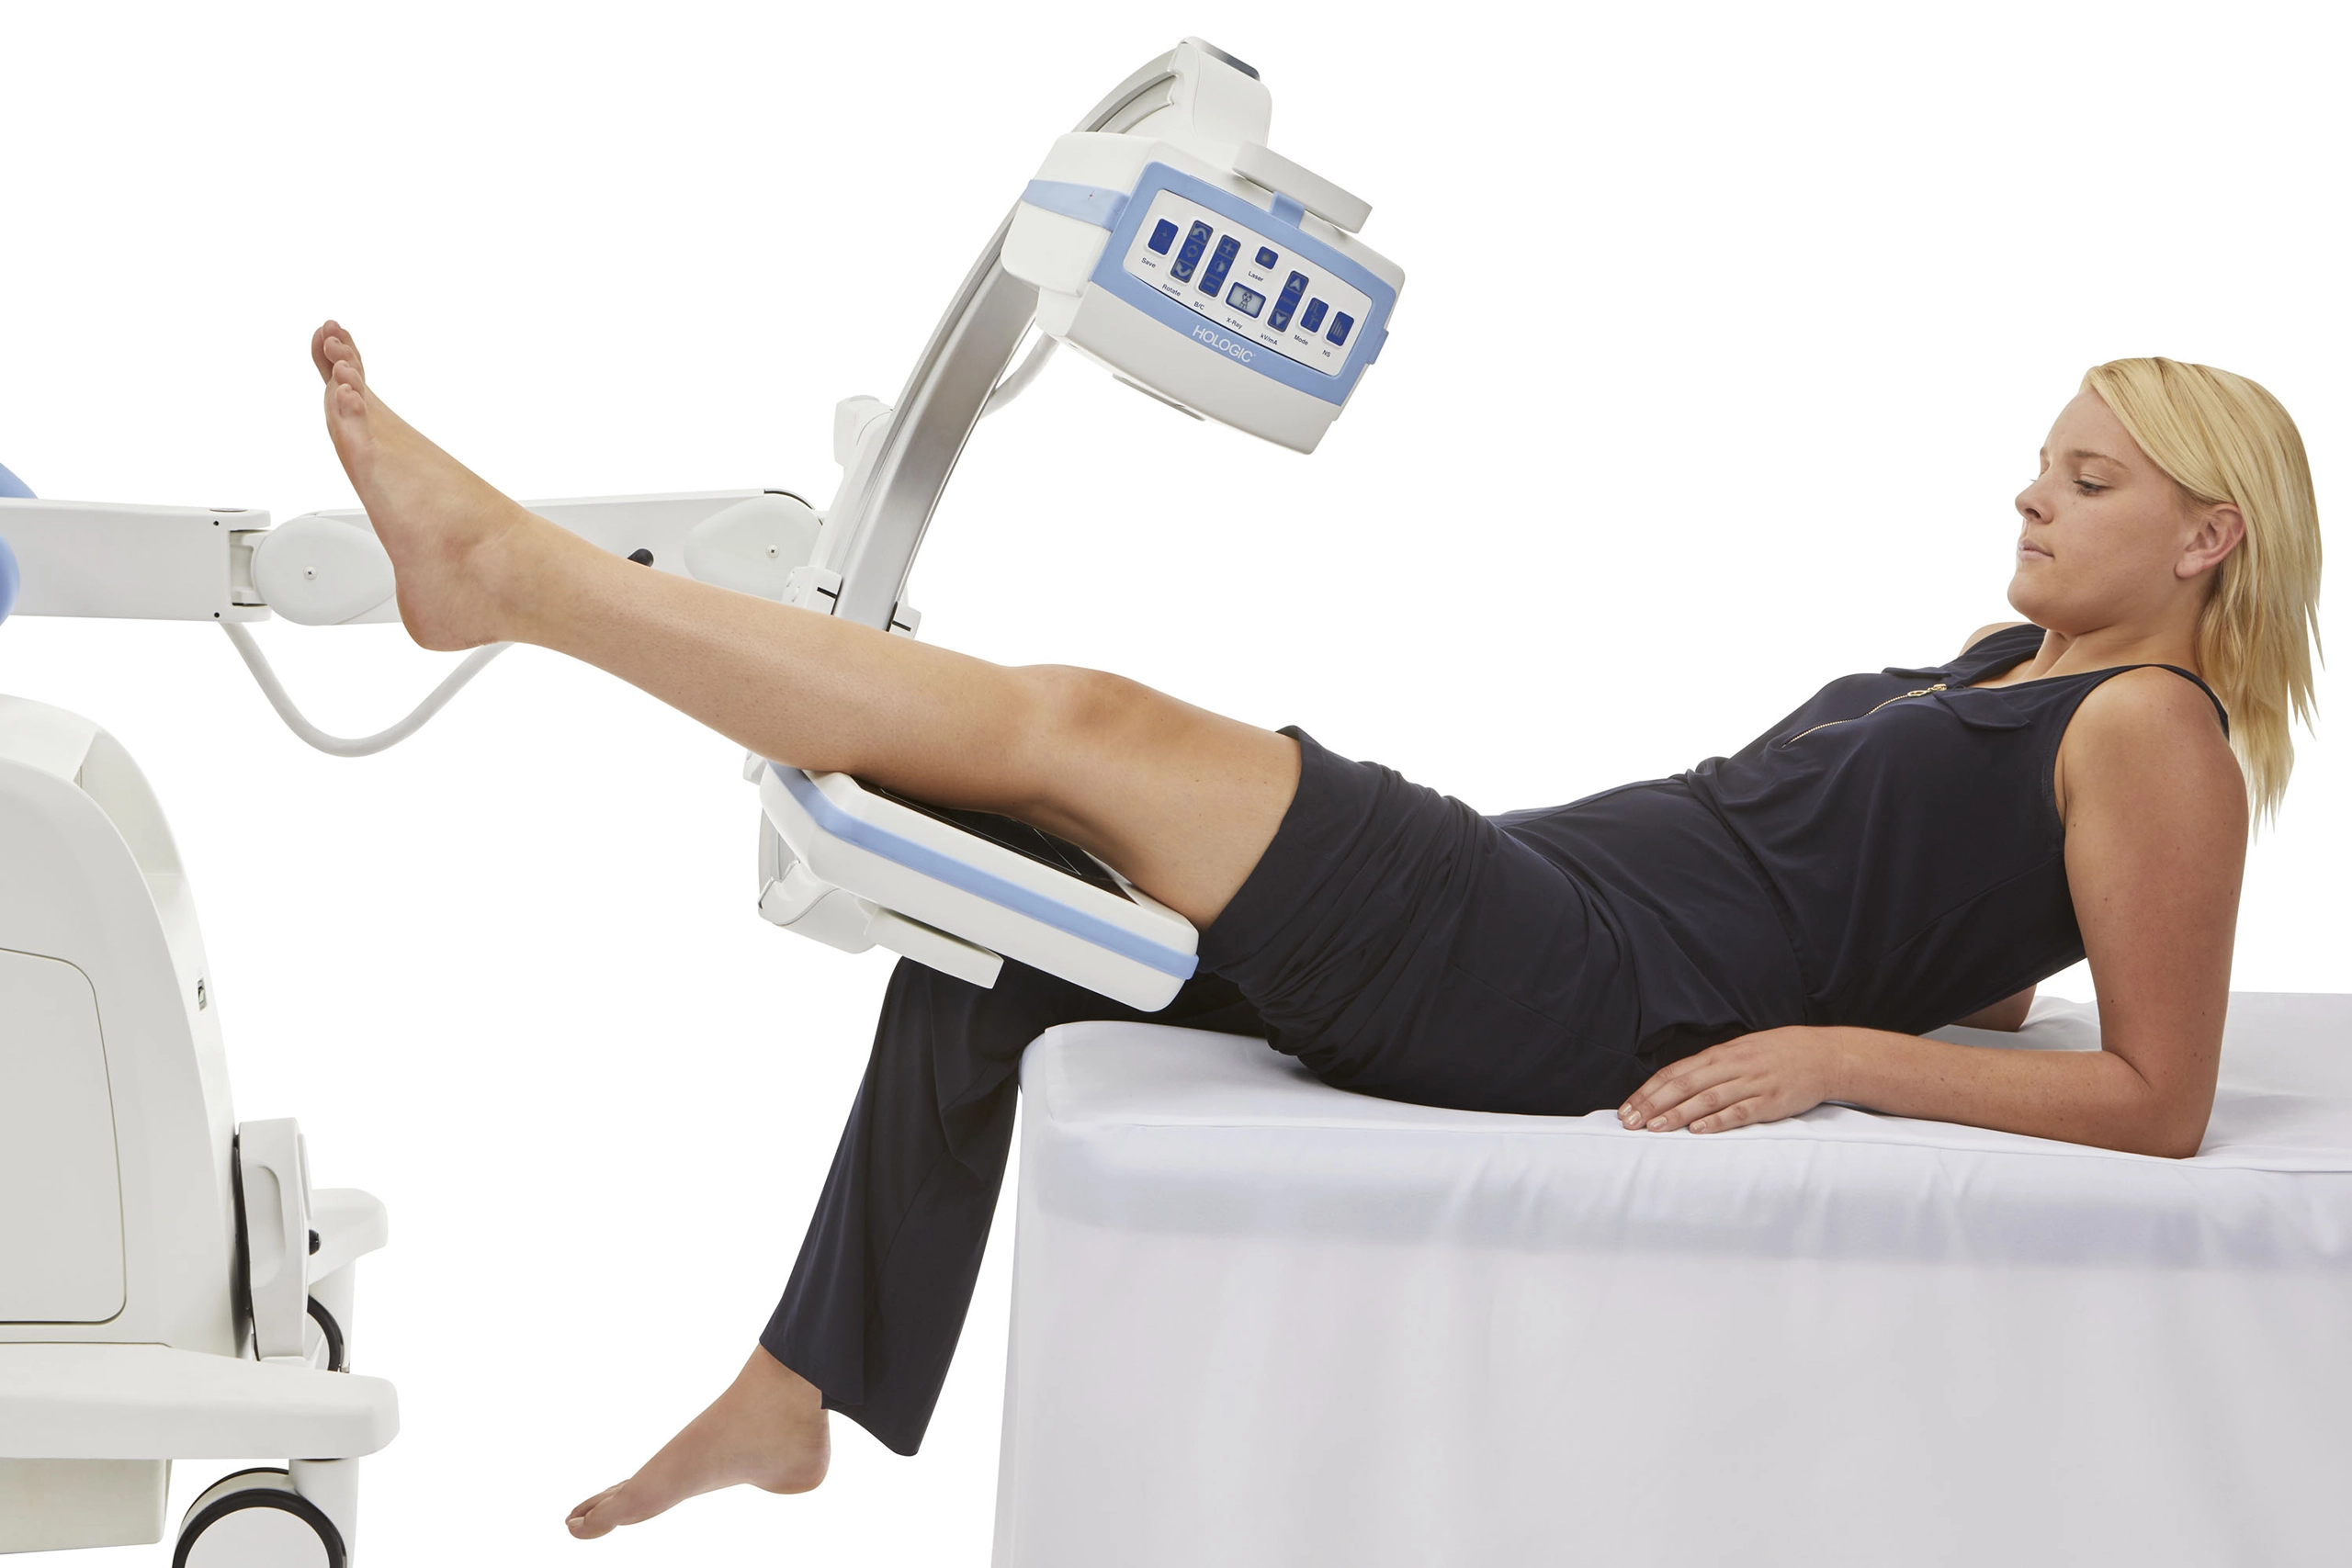
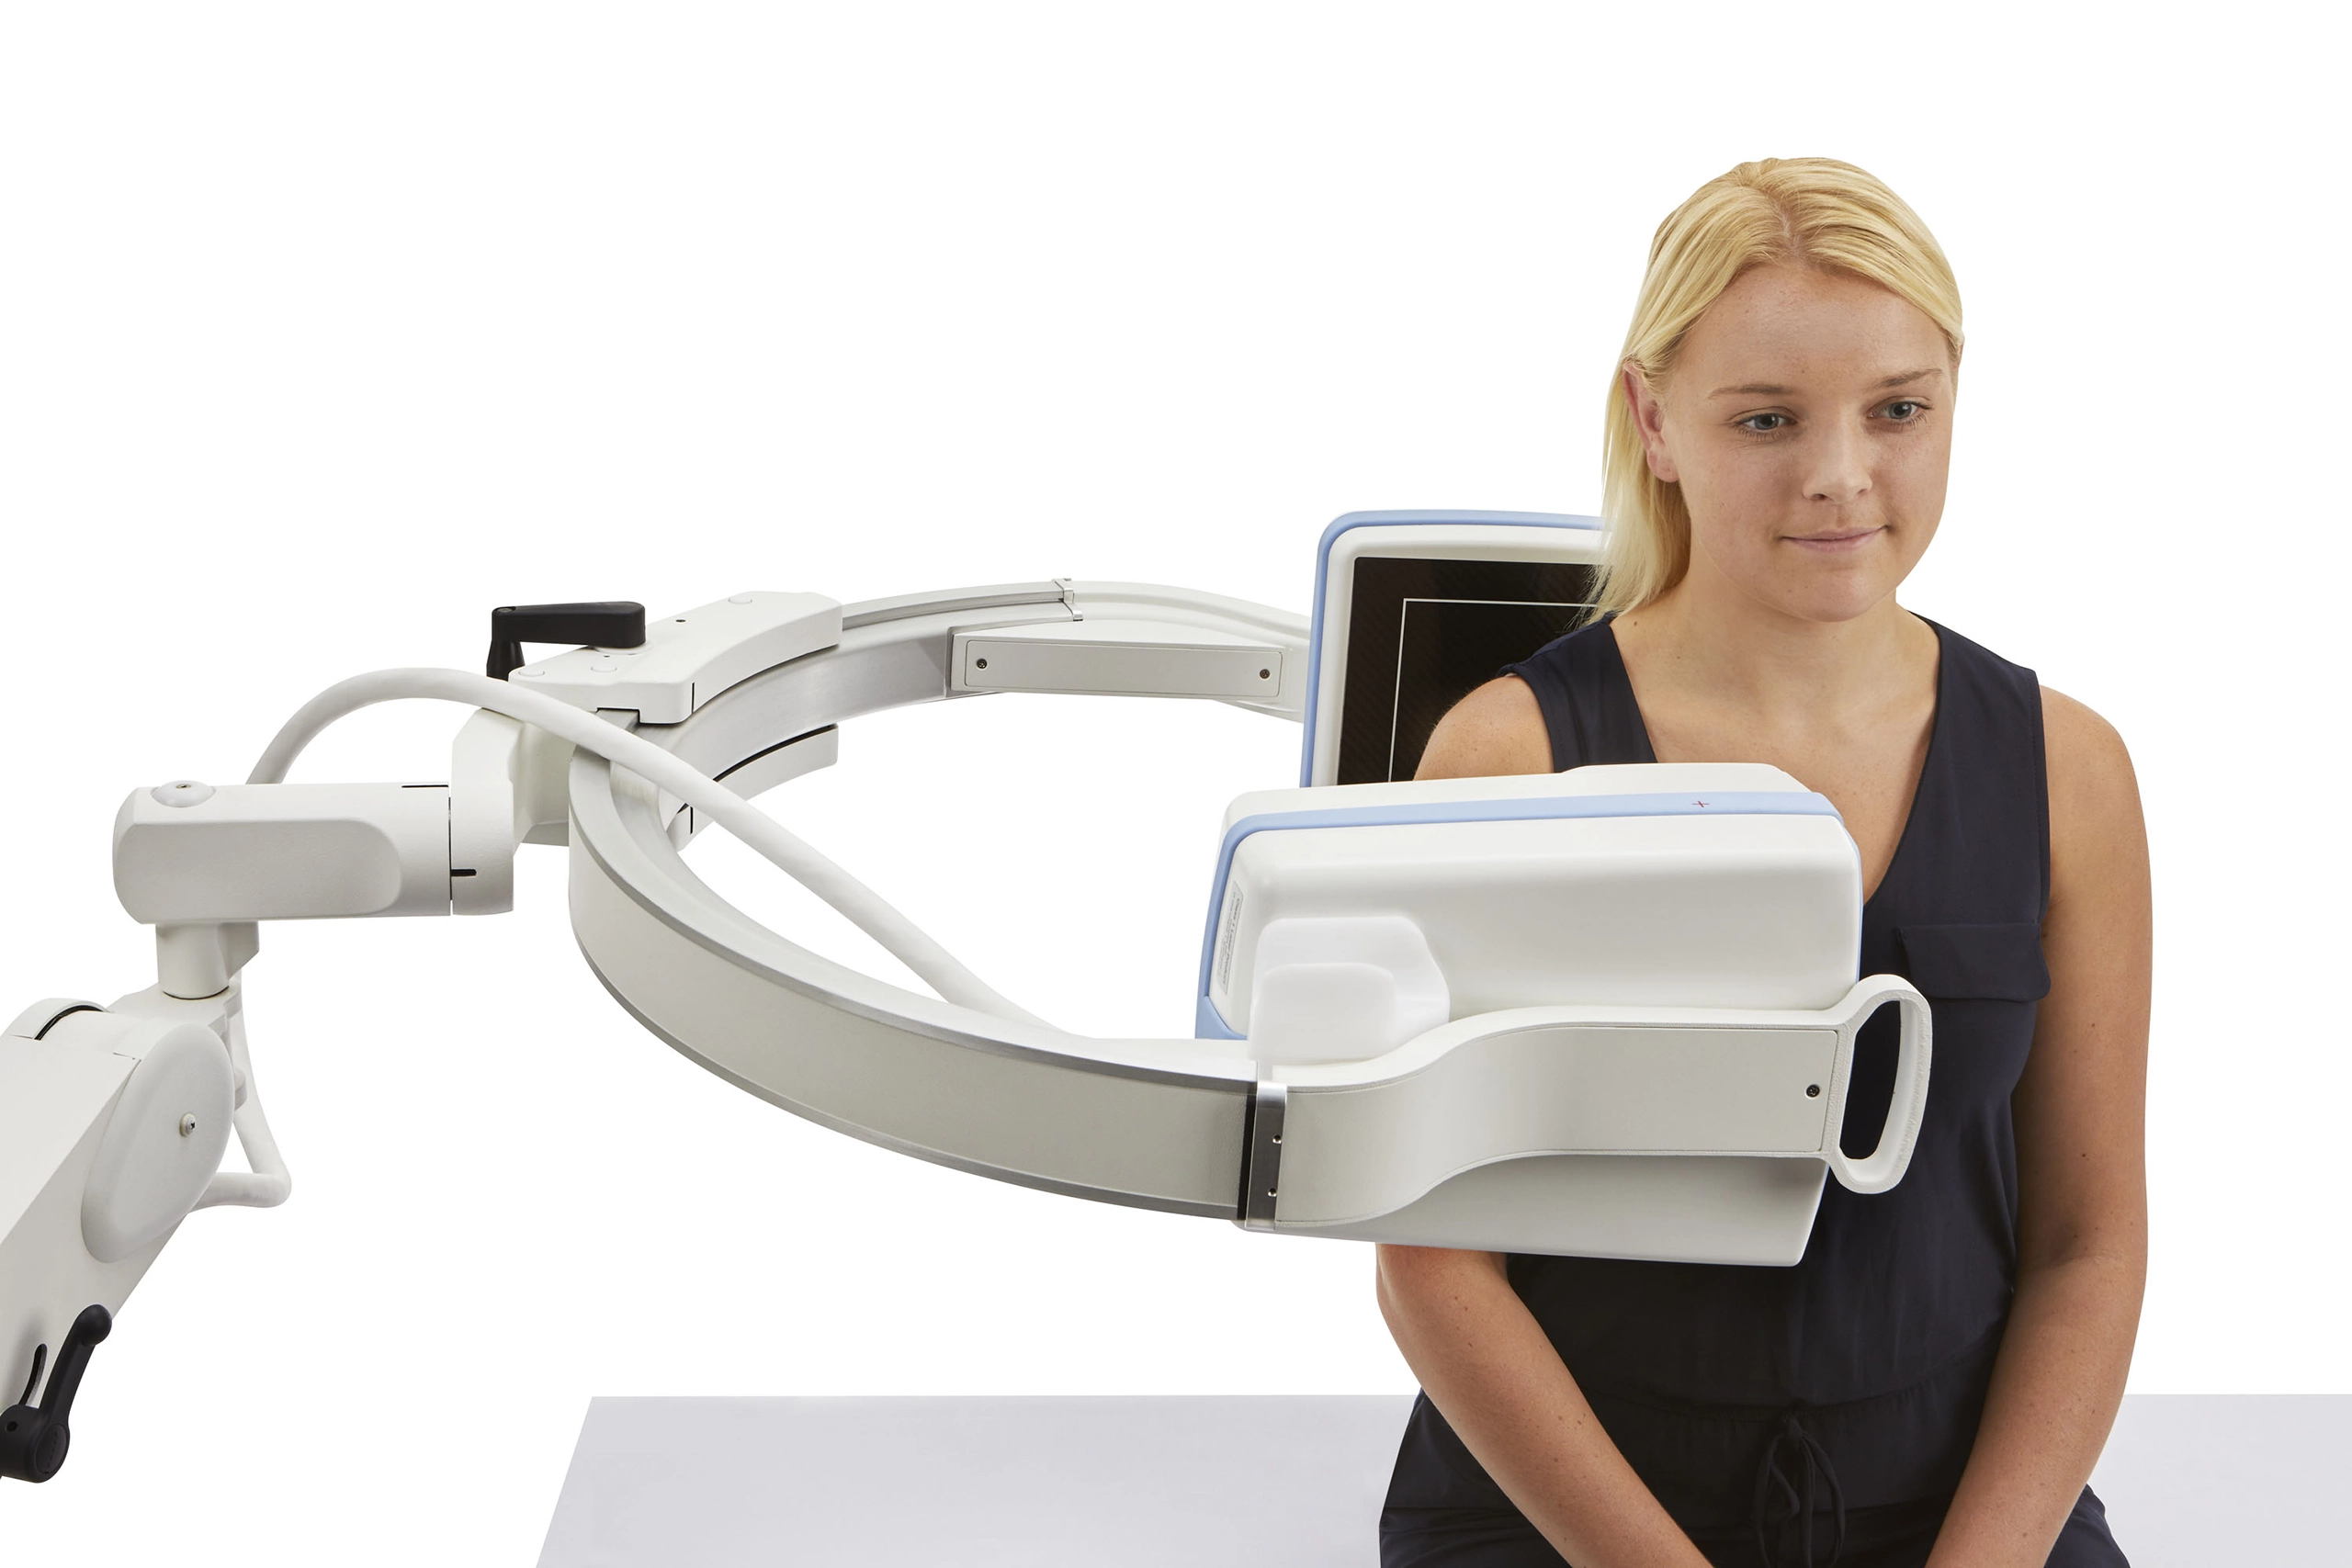
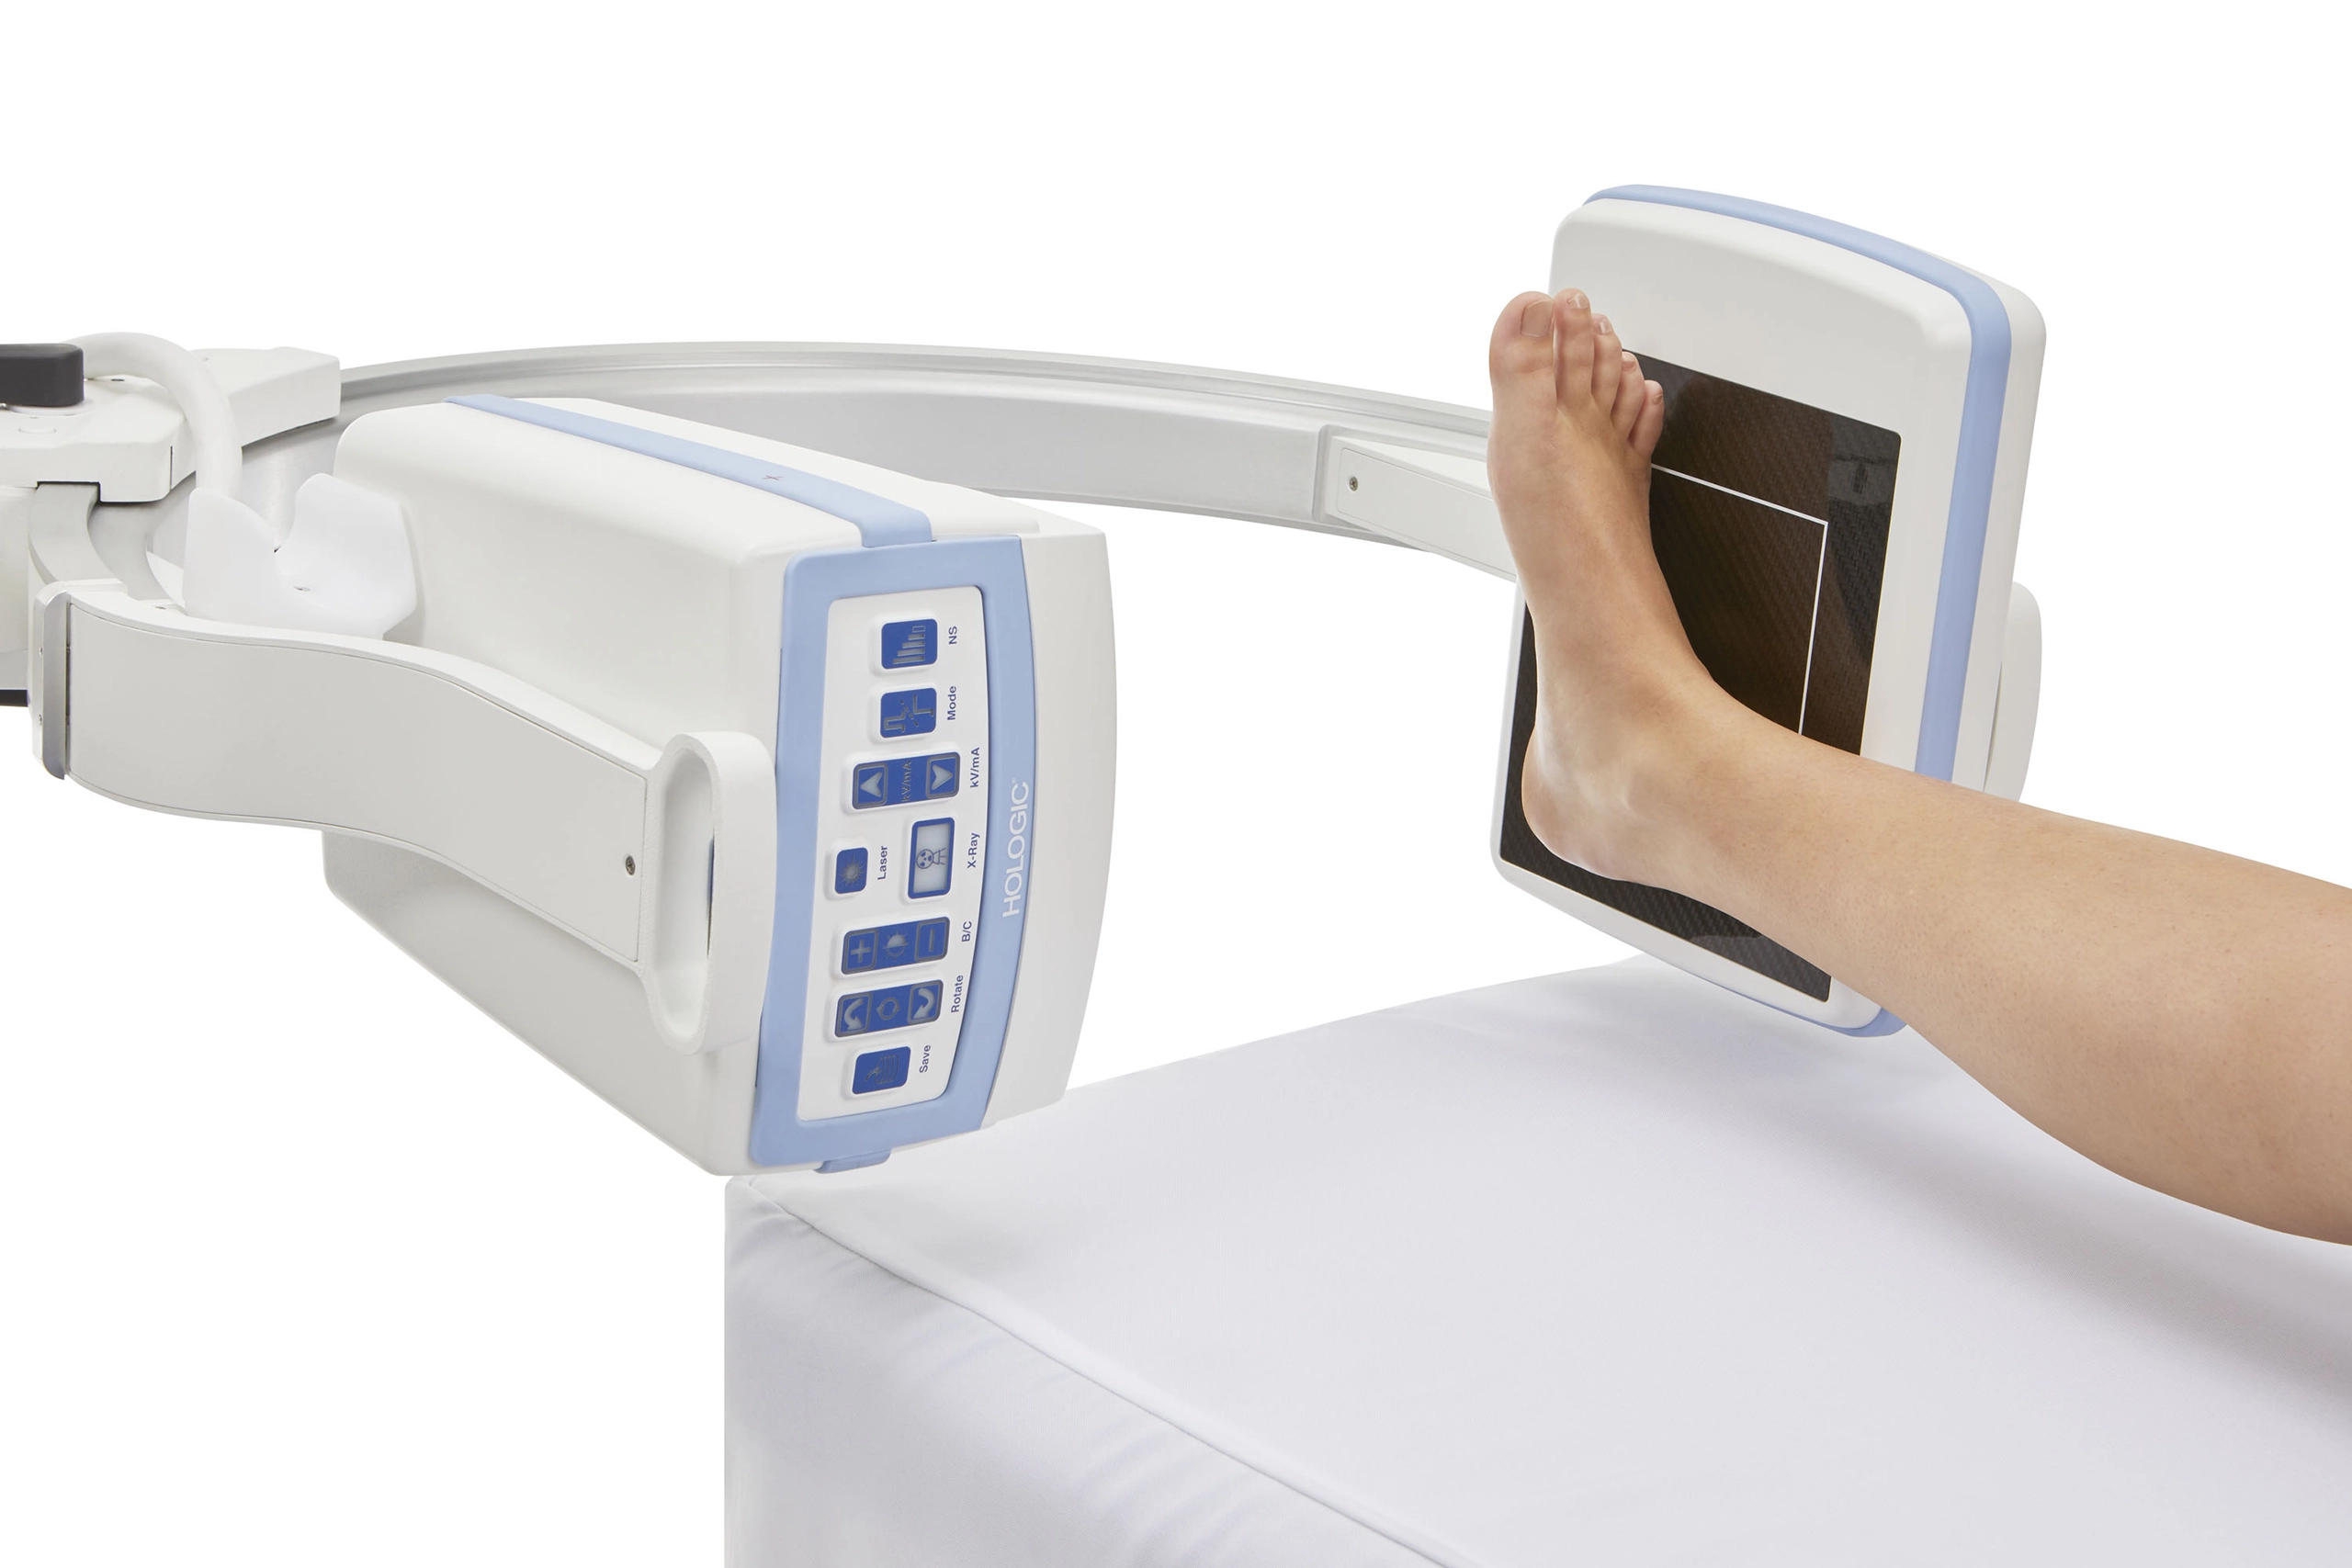
Enables precise positioning and imaging flexibility for long bones and extremities without repositioning the patient.
Provides flexibility to position the imaging arm around the patient, ideal for extremity procedures where mobility and access are critical.
Captures ultra-detailed images with reduced distortion, helping surgeons see bone structure clearly during orthopedic and sports medicine procedures.
Intelligent imaging algorithms automatically adjust for patient size and anatomy to deliver the lowest effective radiation dose while preserving image quality.
Designed for busy ORs and small surgical suites — with a 20” C-arm depth and narrow footprint to minimize equipment clutter and speed up workflow.
Bright, easy-to-use touchscreen with tilt, swivel, and finger zoom makes it effortless to review and manipulate images in real time.
View a 50% larger image (up to 12” x 10”) using the system’s MegaView mode, ideal for visualizing larger anatomical areas without repositioning.
Maintain a sterile field with wireless controls. Supports network printing, PACS connectivity, and export via USB/DVD — all with DICOM 3.0 compliance.
Archive high volumes of cases locally. Each case can store up to 500 images for efficient retrieval and case management.
The Insight FD uses a flat-panel digital detector, offering better image quality and lower radiation exposure than the older Hologic Insight 2 model, which relies on image intensifier technology. FD systems are also more compact and produce distortion-free images. See a full comparison of the Insight FD to other models.
| Component | Specification |
|---|---|
| Image Detector | CMOS flat panel detector, 6” x 4” (15.2 x 10.2 cm), ±90° rotation |
| Pixel Resolution | 2k x 1.5k (75-micron pixel array) |
| X-Ray Source | Grounded tungsten anode, 7.5 W high-frequency tube |
| Tube kVp Range | 40–75 kVp |
| Tube Current Range | 0.020–0.100 mA |
| Focal Spot Size | 0.045 mm |
| Maximum Output | 0.1 mA @ 75 kVp |
| Laser Alignment | IEC Class 1C, timed or continuous operation |
| C-Arm Movement | 120° orbital rotation, 23” vertical travel, 20” depth |
| Monitor Display | 24” widescreen HD LCD, 1920 x 1200 resolution, multi-touch, 350° swivel |
| Viewing Angle | 178° |
| Imaging Modes | Snapshot, Continuous Fluoroscopy, Cine Recording (30 fps), High Resolution (15 fps) |
| Noise Reduction | Ultra/Auto/High/Medium/Low/Off (configurable real-time image processing) |
| Storage Capacity | 8,000 images on solid-state drive (SSD); 500 per case |
| Data Export | DICOM 3.0 compliant; USB, DVD-RAM, network-ready |
| Connectivity | Wired and optional wireless; PACS integration supported |
| Power Requirements | 100–240 VAC selectable, 50/60 Hz, 750 watts |
The Hologic Insight FD is specifically engineered for extremity imaging, making it a trusted tool across a variety of clinical settings:
Capture high-resolution, distortion-free images of the hands, wrists, feet, and ankles during procedures like:
Ideal for fluoroscopic-guided injections, such as:
Support rapid diagnostics and post-injury imaging in:
With its compact design, low-dose imaging, and fast setup, the Insight FD is perfect for:
At Minicarm.com, we offer flexible options to match your facility’s budget and clinical needs.
Typical Price Range: $30,000 – $45,000 (Refurbished or Certified Pre-Owned)
Prices vary based on system condition, year of manufacture, included accessories, and warranty length.
Learn more about financing options.
Pricing varies by configuration. Contact us for an exact quote.
When you purchase or lease a Mini C-Arm from Minicarm.com, you’re backed by industry-leading support and certified expertise.
Didn’t find the answer to your question? Contact Us for help.
Hologic Mini C-Arm models deliver high resolution imaging for extremity imaging, orthopedic imaging, and surgical imaging when detail matters most. As a portable Mini C-Arm and point-of-care imaging device, Hologic helps clinicians capture fluoroscopy imaging with the clarity needed for hand and wrist imaging, fracture evaluation, and other precision-focused applications, while supporting low-dose imaging and more confident clinical decisions.
0:05 – Hey guys, I'm Christopher Bacon.
0:07 – I'm the founder of OrthoScan and the president of Minicarm.com.
0:11 – Today we want to show you how to basically use the Hologic Insight FD.
0:17 – To start it up, always press the green power button down here next to the DVD drive.
0:22 – Note down here is the USB drive.
0:26 – It’s a little hidden, but we know it's there.
0:28 – While this boots up, I’ll show you a little bit of the articulation of the C-arm.
0:38 – That’s as low as we go — it’s about knee level.
0:43 – And that’s as high as we go.
0:45 – You also get 120 degrees of orbital rotation.
0:50 – That you’ve got here.
0:52 – And this right here is the lock, locked in place so it doesn’t rotate when you don’t want it to.
1:04 – Once we get to this screen, always hit the Add Admin button.
1:09 – It takes a couple of seconds to boot into the application.
1:14 – If it doesn’t, give us a call.
1:15 – Enter last name, first name, and patient ID.
1:18 – So just throw in here Raw Bacon.
1:25 – It’s got a touch screen, which can help you navigate through the boxes.
1:32 – Notice that the Perform light just lit up.
1:33 – Give that a tap and you’re ready to x-ray.
1:37 – Now we’re in the imaging screen.
1:42 – Take our hand phantom.
1:45 – Place it in the field.
1:50 – As you can see, I pressed the foot pedal for approximately one second.
1:55 – Always do that — don’t just tap it.
1:58 – You won’t get the best quality image if you just tap it.
2:02 – Also, in between pressing the button, wait about a second.
2:05 – I’ll show you why here.
2:10 – When this populates, then you can go ahead and initiate another fluoro or another single shot.
2:21 – Make sure the system runs properly and works as expected.
2:27 – Once we’re finished imaging, press the Review button.
2:31 – You can select all and then save.
2:36 – Or you can choose which ones you want by pressing the Control button.
2:42 – Then hit Save.
2:44 – You can also export.
2:47 – If you had a USB plugged in down below, you would see it located here.
2:53 – Just touch it.
2:56 – You can also save to the DVD drive.
2:58 – You can save in TIFF and JPEG formats for your EMR.
3:03 – We’re just going to hit Cancel here.
3:06 – You can also print.
3:10 – As long as at least one image is highlighted, you can print.
3:16 – Once you’re finished, hit End Session.
3:19 – You’re back out to your splash screen.
3:22 – When you want to review cases on the machine, press Review.
3:29 – You can choose multiple cases by hitting the Shift button.
3:33 – Select them and then review.
3:36 – You can review all the images at once.
3:39 – On this machine, you can rotate the flat detector 180 degrees.
3:45 – There are indents, so you feel it when you get to center and at both ends.
3:53 – The nice thing is you can do this while you’re x-raying.
4:05 – To shut the machine down, always shut down from the screen.
4:10 – Please do not use the on/off button.
4:13 – That does not allow Windows to shut down properly.
4:18 – Over time, it will start giving you issues.
4:23 – Once the screen goes black, unplug it from the wall.
4:27 – Try not to keep this plugged in all the time because certain components are constantly powered.
4:33 – That’s an overview of the Hologic Insight FD.
4:36 – If you're interested in sales or service, please give us a call at 800-643-2998.
4:43 – Or send us an email at info@minicarm.com.
4:46 – Thank you.